A Sequence Of Compositions

For this exercise I have used a child’s birthday party with a magician there and spent pretty much the whole time with the camera to my eye, it was different to watch a scene unfold through the viewfinder.
Because of the type of event and being indoors I will shoot at an ISO of 400 and will not use the flash so as not to draw attention to myself so I can get an image of people enjoying themselves not worrying if I have just taken a picture of them.
All the people in all of these images gave me permission to use them.


Image 1. With this shot I saw the little girl on her mums lap playing with her nan but noticed I had to move because, most of the blinds in the hall were a peach/orange colour and were shut so making everything have an orange sort of colour to it then there was the sun light coming in from the doorways behind them which was making a bit of lens glare and overexposure in the doorways, also I felt it would be better to get a bit closer with the shot.


Image 2. With this image I zoomed in a bit more to see how it looked but also lowered my position but was still left with a bit of overexposure in doorways plus people started to walk past me so they were getting in the way so I moved around to the right.

Image 3. I liked this image a lot more as you can see the interaction going on between the 3 of them. There is still a bit of a lens glare just above the middle lady, will try moving a little more to the right and see what I can get.

Image 4. My final shot in this set of images and I love it you can see how the little girl is holding eye contact with her nan, the nan enjoying giving the little girl some attention and the little girls mum watching with a nice embrace and a loving watch over her.


Image 1 2nd set. With the telephoto lens from across the hall I noticed the birthday boy on his mummy lap on the floor just watching the magician. In this shot the birthday boy had just got a present from the magician so having a quick look at it all nice shot but can see mum to well so will zoom in a bit more.


Image 2 2nd set. I like this image seeing how everyone is caught up watching the magician but want to see what it would be like to take the frame in a bit more with the zoom.


Image 3 2nd set. Almost everything how I want it there is a hand that has come up at the bottom of the screen which I find distracting. Try again.


Image 4 2nd set. Just as I wanted the image Birthday boy and mum watching the magician not knowing that the image was taken until later on in the day when I told her.
Now I went for a sequence with 2 girls my daughter and my niece as they were sat together and looked ideal as they were really getting in to the magic show and had no idea that I could see them through the viewfinder as I followed them in amongst the children.


Image 1 3rd set. The magic show is now underway now, being drawn towards that pink balloon in the image.


Image 2 3rd set. Thought I would come back to the balloon just looking as to what’s here maybe the magician is worth a look.


Image 3 3rd set. Nothing I can see is jumping out at me so I will go to just the kids in the crowd.


Image 4 3rd set. The kids getting involved in the show perhaps changing the layout will work better.


Image 5 3rd set. This looks better can not pick out one thing to go for I feel the image is a little crowded.


Image 6 3rd set. Found that pink balloon drawn in to the 2 girls glued to watching the magician will try zooming in a little.


Image 7 3rd set. I moved a couple of feet to my left and zoomed just a small amount, feel I should have moved the camera a little to the right as no centred.


Image 8 3rd set. Have zoomed in that little bit but do not like all the half pieces of kids around the edges so will zoom in on the girls faces and see how it looks.


Image 9 3rd set. The girls look good they are caught up watching and waiting to see what happens just want the fingers out of the mouth.


Image 10 3rd set. They are intently watching the show but that balloon just will not go away so I will move to come more from the side perhaps then no balloon.


Image 11 3rd set. Have come around to the side at a lower angle and the balloon got taken away by the girls mother, I like what I see will zoom in a little.


Image 12 3rd set. Had to move back to the right as the girls moved forward do not like the hat in the view.


Image 13 3rd set.
Got it 2 girls in sheer amazement at what the magician had just done, they are nicely centred the children in the background are fixed on the magician. None of the children have the tops of their heads cut off. I love it.

Part 1 Exercise 2 Object In Different Positions In The Frame

In this exercise it takes a look at positions within the frame so would the object/subject be dead centre or would it be off to one of the sides or corners. So with this in mind I had to think of somewhere that had an object in a clear area so as I was walking along a path thinking what could I use I came upon a big group of Galanthus (snowdrops) while looking at them as I walked on past could see that this would be ideal as the sun was shining and the trees were filtering the light wonderfully.
I did how ever get a little carried away and took quite a few images. I feel that I took so many because it was a bunch of flowers they could be positioned pretty much anywhere in the frame, this is due to the fact that the fallen leave litter gives a nice dark backdrop letting the whiteness of the flowers to stand out and draw your attention to them, but I do feel it would be down to what you would use the image for, such as gift cards you may want the flowers to one side so as to write something in on the other side without losing the flowers, that sort of thing.
Image 1 I found that the snowdrop almost gets lost in the image and the light was a bit bright, so for the other shots I took the frame in closer so to remove a lot of the dead area around them, and adjusted the settings in manual so as to use the natural light to my advantage by increasing the F stop but also making sure that the shutter speed was fast enough to capture a frozen image and not to capture any motion blur due to the wind.

Image 1 as you can see not very exciting.


Image 2 the frame taken closer keeping the object centred.

Image 3 off centred to the lower left.


Image 4 off centred to upper left.


Image 5 off centred to upper right.


Image 6 off centred to lower right.


Image 7 to the edge lower right corner.


Image 8 lower middle edge.


Image 9 into the lower left hand corner.


Image 10 middle left edge.


Image 11 into the top left.


Image 12 now I placed it in the middle of the top edge of the frame.


Image 13 top right corner.


Image 14 middle edge of frame on the right.

When I go over all of the images I find that I like two of the images, those being image 2 and image 14.
So these images are the one that is centred because it is there in front of you and you are draw straight towards it. With image 14 with the snowdrops at the right hand edge I find that the image looks nice with the contrasts of the brown and the green but you get drawn back to the whiteness of the snowdrops.
Out of the two that I have chosen my favourite is image 14 where it is to the right hand edge I just feel it is a change from a lot of the usual images you see around.

Part 1 The Frame. Fitting The Fame To The Subject

For this exercise I thought that I would use Stonehenge as it accessible, I can get close up to it or move quite away from it. Now I needed 4 shots for this exercise, 1 had to be a conventional shot which I like to call a point and shoot shot like a lot of people would do, then I had to take a shot of the subject filling the frame edge to edge, thirdly a shot up close showing the detail of the subject and lastly, a shot where the subject is about a quarter or less in the frame so as to show off the subjects surroundings.

So without a further ado here are my 4 shots.

Image 1. The conventional shot I noticed as I walked in many people were stopping here to take a picture so I took 1 to.

Image 2. This shot shows the subject at one edge of the frame to the other.

Image 3. This shot is a close up shot looking through some of the stones to see the inner stones, in this shot you can see that time has had a toll on the stones by the fact that some have fallen and some are tilted and some are not as smooth as they would have been many years ago.

Image 4. Backing away from the subject showing the subject in its surroundings with blue skies a bit of cloud fields around it and the people coming from around the world to view the stones

Next in this exercise it was to crop the image to show the subject in an alternative  way and these are what I came up with.

Crop 1 I cropped this to the size of 16″ by 6″ this reduced the amount of sky and reduced the grass area a small bit also it trimmed a small section of the edges.

Crop 2 this image I cropped to a 10 by 8 size showing the sky the stones and the visitors to Stonehenge getting rid of a lot of the grass.

Crop 3 this was cropped to custom to put the stones almost edge to edge but keeping as much of the sky and the grass as I possible could keep and cropping off as many of the visitors that were possible to do without using any image editing software.

After taking some time and having a good look at all the images I have taken for this exercise I feel that it is the quarter or less image that really jumps out at me, it shows a sense of power and yet so at ease. i have to say that i am happy with the results all but image 2 I think that I must have caught the sun a bit

Looking at Part 1

Ok looking at part one now now its time for the real stuff.

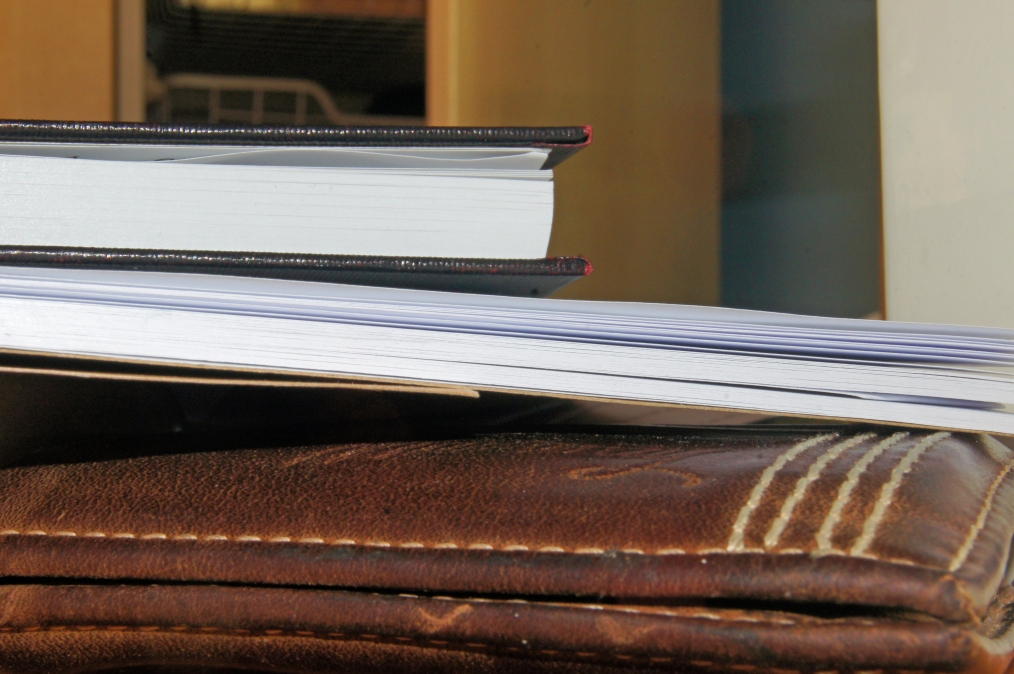
So this project is about looking through the viewfinder. Now in the introduction it tells you to put the camera up to your eye and to look around the room you are in to see if you could see anything that was interesting, after looking around I thought that none of this room was interesting its my office its not a fun place. This is when i carried on reading to see that it says that when many people did this they could not see anything because all the surroundings were over-familiar. At this point I put the camera down, noticed that I had left it switched on so went to turn it off this is when I noticed this image.

Image

There this was just sitting there and I thought wow this is an interesting shot and it was in the room I was in just sitting there and I almost missed it, I was wondering where my wallet was for the last few days, found it.

Exercise 5 Panning with Different Shutter Speeds

This exercise was very similar to the last with a slight difference that being following the subject through the exposure, so following a moving subject. This is called panning and it does come natural to some people but takes some practice for others, I have to say that I am one of those that feel I have to practice this.

I decided that I would stick with the cars for this exercise and I knew that this could be difficult as the cars were quick so the pan would have to be quick to keep in the frame.

I took a total of 14 images for this exercise from speeds of 1/320 going down to a 1 second exposure.

When going through all of the images I found that I really liked image 14 this was a 1 second exposure at F22 using a ND2 filter to cut the highlighting down, I was impressed that it was the longest exposure I took, the car has still got detail plus there is the streaking from the car and the background blended itself quite smoothly with a slight curve to it cause from the movement of the panning.

When I go through the 2 sets of cars I would have to choose image 14 from the panning as my favourite image as this is an image I like, also I felt that this would be an exercise I would not like yet it has an image I am very happy with.

But it is image 10 I feel that has got everything right as to what this exercise was all about, the car is very clear the background is a blur so it shows movement but still keeps some of that sharpness to it.

Image 1 1/320 F4

Image 2 1/250 F4

Image 3 1/200 F4

Image 4 1/160 F4

Image 5 1/125 F4.5

Image 6 1/80 F4.5

Image 7 1/50 F6.3

Image 8 1/30 F9

Image 9 1/15 F10

Image 10 1/5 F20

Image 11 .4 F22

Image 12 .4 F22

Image 13 .8 F22

Image 14 1second F22

Exercise 4 Shutter Speeds

After reading what I needed to do for this exercise I felt stuck trying to think of what I could do, the book had ideas about a friend on a bike or walking, water flowing over some rocks but it said to think of something else. So after thinking about it I thought that what is always moving and is not always the same…. Traffic!!
So I thought some more about it and thought that I would need to use higher speed settings but would see what I got from starting at a speed of 1/3200 of a second to 0.4 of a second.
With the road I had chosen it was near a roundabout so the cars passing would be speeding up after coming off the roundabout so I could estimate their speed to be from 25Mph to 40Mph although 1 car saw the camera and slowed down very quickly. So with the cars traveling at speeds the shutter would need to be fast to keep a sharp image.Out of the images, I found that image 7 is the last image to be sharply frozen which had a shutter speed of 1/800 and the aperture was set at F4. Once you go past this image you can see that motion blur starts to set in firstly on the wheel trims.
The images are on next lot of pages.
Images 1-7 are all sharply frozen and you pick up a lot of the details including the drivers.
Images 8-9 start showing blur on the wheel trims.
Images 10-12 show more blur on the wheels and also the body work is starting to show some motion blur.
Images 13-17 show a lot more blur but starting to turn to a streaking blur looking like movement as the background is still but the cars are streaking through still able to see what the images are.
Images 18-19 it has become very difficult to tell what the subject is as the streaking has become so strong and there are no character lines to show the car.

The image I like is image 17 as the background is frozen solid and crisp almost relaxed but there is this car clear to see with a nice streaking blur looking like a picture from a classic spy novel.

Image 1 1/3200 at F4

Image 2 1/2500 at F4

Image 3 1/2000 at F4

Image 4 1/1600 at F4

Image 5 1/1250 at F4

Image 6 1/1000 at F4

Image 7 1/800 at F4

Image 8 1/640 at F4

Image 9 1/500 at F4

Image 10 1/400 at F4

Image 11 1/320 at F4

Image 12 1/250 at F4

Image 13 1/160 at F4.5

Image 14 1/125 at F5.6

Image 15 1/50 at F8

Image 16 1/30 at F9

Image 17 1/15 at F18

Image 18 1/5 at F22

Image 19 0.4 sec at F22

Exercise 3 Focus at different apertures

For this exercise it was do use the same or similar subject as the last exercise so I stayed with the graveyard for this. This time instead of a fixed aperture, it was time to use different apertures to see how they affect the image, so picking a fixed point in the image I choose the 3rd grave stone.

The first image was done with the widest aperture setting  which was set to F5.6 with an ISO of 100 and a shutter speed of 1/20 seconds. When you look at the image you can see that the 3rd stone is clear and in focus but not much else is.

So on to image 2 which shows a lot more sharpness in the image around the centre point showing a few more of the grave stones in focus, this image was shot at an ISO of 100 an aperture of F16 and a shutter speed of 0.4seconds.

In Image 3 I took the aperture to an F36 with a shutter speed of 1.6 seconds and the ISO at 100. With this image it is easy to see that the whole image is in focus and every detail can be seen throughout the image this is an image I like because every aspect of the image is viewable

Exercise 2 Focus with a set aperture

This exercise was to take 3 images of an area with a bit of depth to show this off, I chose to use this graveyard as it was by a school I know and went for a low approch to the image. In image 1 you can see that the first stone is in focus then the as you get to the end of this stone to the rest of the image you lose the sharpness of the image. Image 2 the focus point was on the beginning edge of the thrid stone this has let us to see more of the image in a sharper view. In image 3 it is easy to see that the focus point is past the other two points as the brick wall in the back ground is now in focus as is the last lot of stones. when I look at all three images I feel that i prefere image 3 this is because that is an image I like but I do feel that the image could be better if the camera was moved a little bit more to the left and foward about 2 feet then you would lose that out of focus first stone or at least move it more to the right of the image.

Exercise1 focal length and angle of view

Thought I would make a start today spent most of the weekend reading through the paper work.

the exercise was good it is always nice to start of a bit easy I know that the Sony Alpha 33 I use is a good model and is full-frame at 3:2. I start off as the book has said I took the first image of my electric fireplace with the camera on tripod so it always stayed in the same spot the first shot was at about 52mm on lens, this gave me an image that when held at just under an arms length looked as if it was the same size. The second shot was taken at a wide angle of 18mm to make this appear to be the right size to my view I had to hold the image around 2 inches from my eye. Now it was time for using the telephoto lens, with the lens set to 300 keeping the camera in the same place on the tripod I took my shot and then held up the print, this is where I found I had to go past my object that I had focused on to make it appear to be the same size.

I will now put the images on here then make a start on exercise 2.

Hello world!

Hi thanks for looking at me, I hope you all enjoy looking at my blog i will be posting pictures  and my course on here and hope it looks ok.

Want to know more about me then go to the about me section thanks.